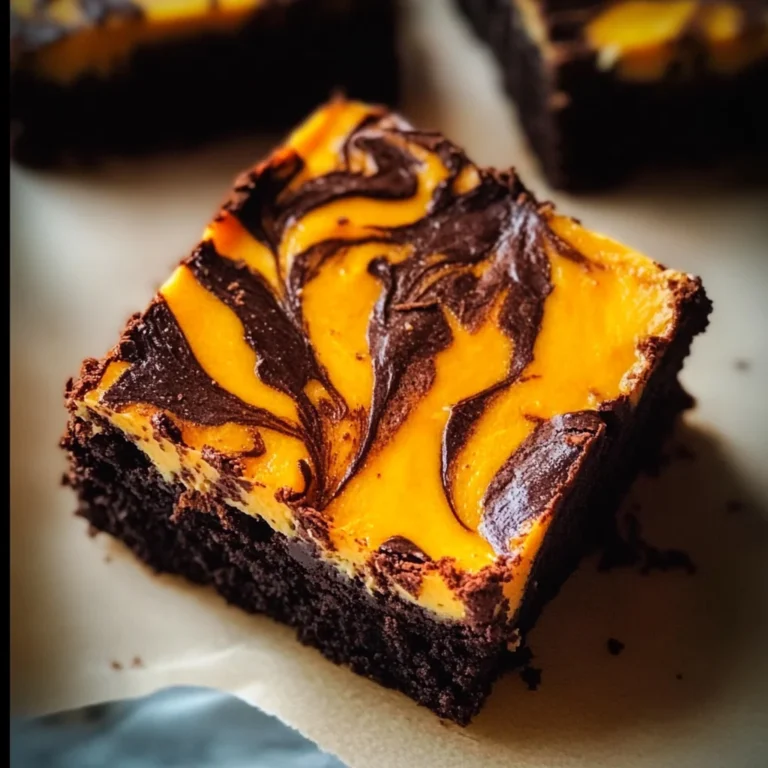
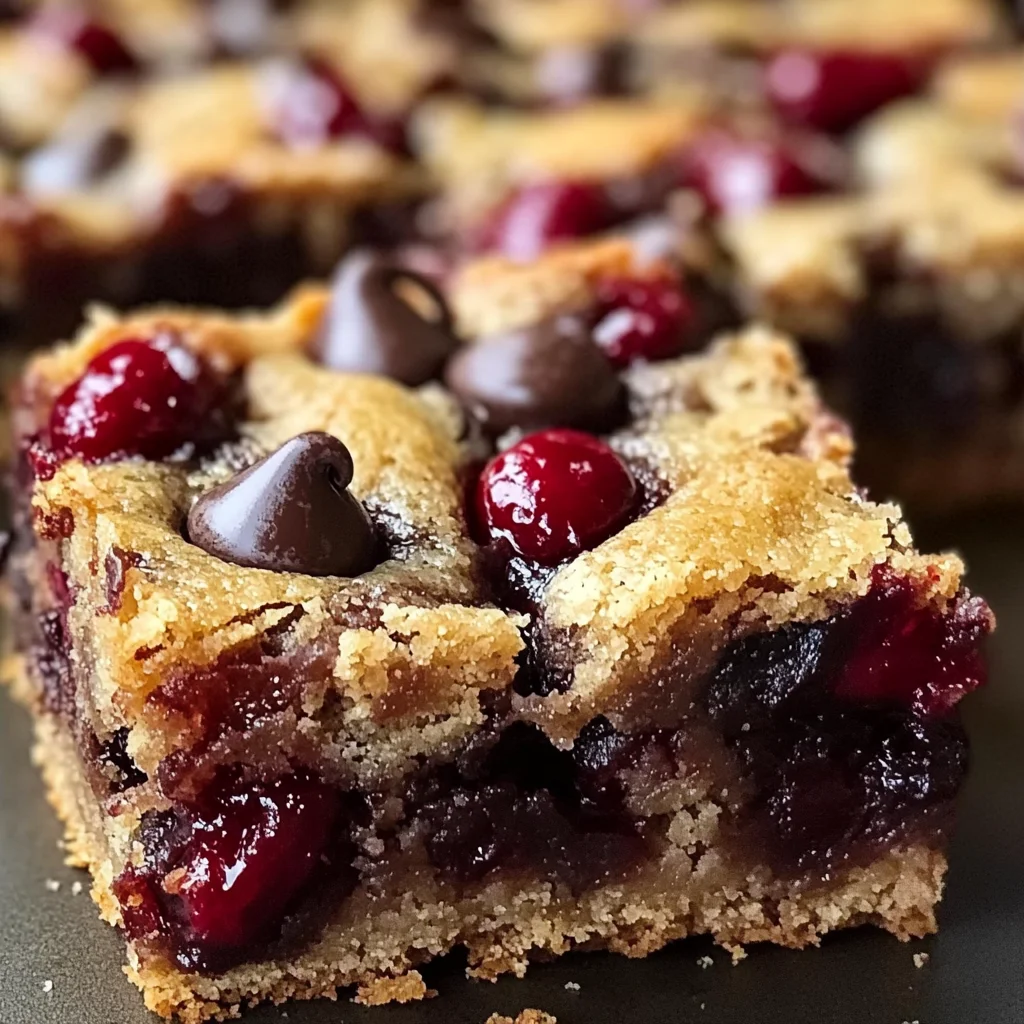
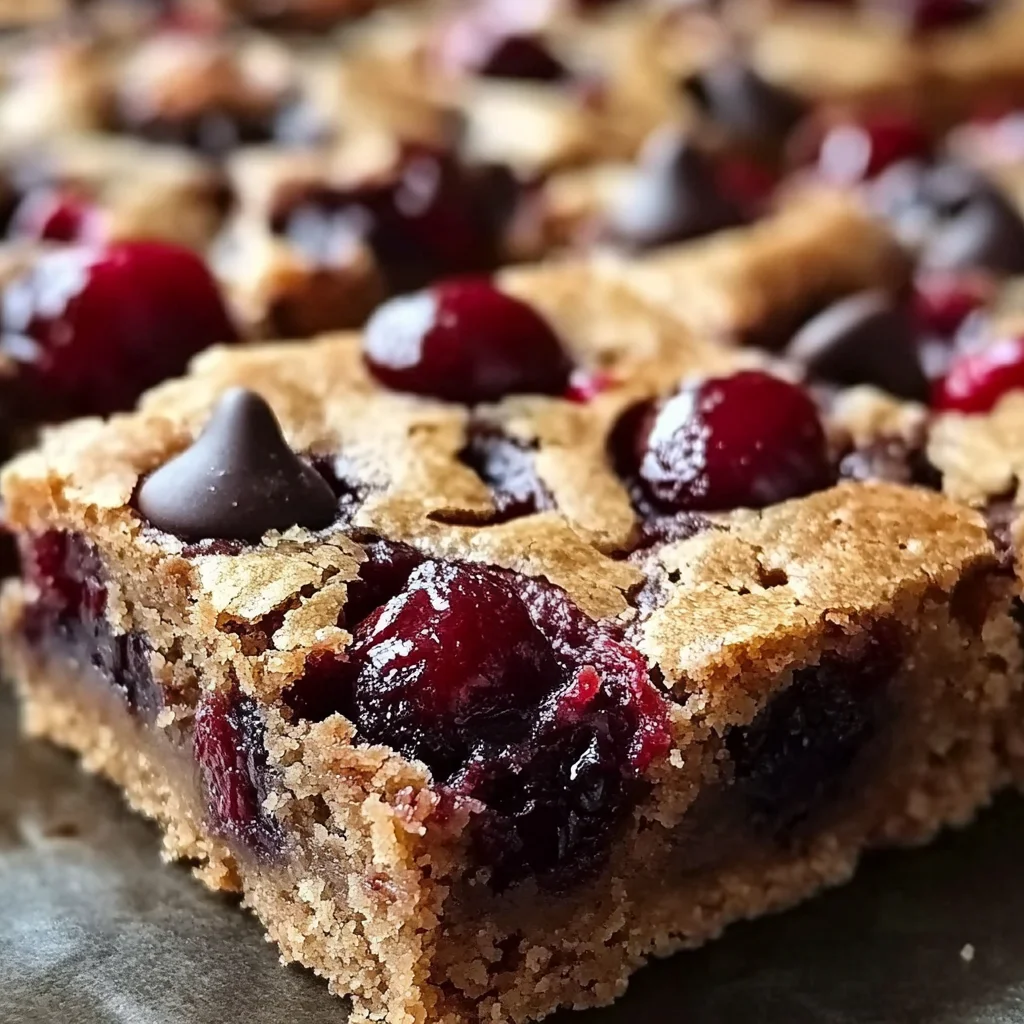
Chocolate Chip Cherry Bars
If you’re looking for a delightful dessert that combines rich chocolate and juicy cherries, you’ve landed in the right spot! These Chocolate Chip Cherry Bars are a personal favorite of mine, and I can’t wait to share them with you. They have a lovely blondie base that creates a soft, chewy texture, making them perfect for any occasion—whether it’s a busy weeknight treat or the star of your next family gathering.
What makes these bars truly special is how easy they are to whip up. You can have them baking in your oven in just about 10 minutes. Plus, the combination of semi-sweet chocolate chips and cherries brings a burst of flavor that everyone loves. Trust me; once you try these Chocolate Chip Cherry Bars, they will quickly become a staple in your home!
Why You’ll Love This Recipe
- Quick and easy preparation: With just a few simple steps, you can have these bars ready to bake in no time!
- Family-friendly appeal: Kids and adults alike will be reaching for seconds—they’re simply irresistible!
- Make-ahead convenience: Bake these bars in advance and store them for later snacking or dessert.
- Deliciously versatile: You can easily customize the ingredients to suit your taste or what you have on hand.
Ingredients You’ll Need
These Chocolate Chip Cherry Bars use simple and wholesome ingredients that you may already have in your kitchen. Let’s gather everything we need to make this delightful treat!
- 1/2 cup unsalted butter (melted (1 stick))
- 1 cup light brown sugar (packed)
- 1 large egg
- 2 teaspoons vanilla extract
- 1 cup all-purpose flour
- 1/4 teaspoon salt (optional)
- 3/4 to 1 cup semi-sweet chocolate chips
- 1 cup cherries (fresh or frozen*)
Variations
This recipe is wonderfully flexible! Here are some fun ways to switch things up if you want to experiment:
- Add nuts: Stir in some chopped walnuts or pecans for an extra crunch.
- Mix in other fruits: Swap out cherries for raspberries or blueberries for a different fruity flavor.
- Change up the chocolate: Try using milk chocolate or dark chocolate chips for a richer taste.
- Make it gluten-free: Substitute all-purpose flour with your favorite gluten-free flour blend.
How to Make Chocolate Chip Cherry Bars
Step 1: Prep Your Pan
Preheat your oven to 350°F. Line an 8-by-8-inch pan with aluminum foil and spray it lightly with cooking spray. This helps ensure your bars come out easily after baking.
Step 2: Melt the Butter
In a medium microwave-safe bowl, melt the butter for about 60 seconds. Melting the butter gives your bars that lovely chewy texture, which is essential for blondies!
Step 3: Mix in Sugar and Egg
Add the packed light brown sugar to the melted butter and stir well until combined. Then, add the egg and vanilla extract, continuing to mix until everything is blended nicely.
Step 4: Combine Dry Ingredients
Next, add the all-purpose flour and optional salt. Stir gently until just combined; be careful not to over mix as this could result in tough bars.
Step 5: Fold in Chocolate Chips and Cherries
Gently fold in those delicious semi-sweet chocolate chips along with your cherries (I love leaving them whole!). Pour the batter into your prepared pan, smoothing it out evenly.
Step 6: Bake Your Bars
Place your pan in the oven and bake for about 27 to 32 minutes. You’ll know they’re done when the edges start pulling away from the sides of the pan and the center is set.
Step 7: Cool and Slice
Once baked, allow the bars to cool for at least an hour before slicing into squares. They can be stored in an airtight container at room temperature or refrigerated for up to one week, or frozen for up to three months!
Enjoy sharing these delicious Chocolate Chip Cherry Bars with loved ones!
Pro Tips for Making Chocolate Chip Cherry Bars
Making the perfect Chocolate Chip Cherry Bars is all about attention to detail. Here are some pro tips to ensure your bars come out delicious every time!
- Use room temperature ingredients: Bringing your egg and butter to room temperature helps them combine more easily, resulting in a smoother batter and fluffier bars.
- Measure flour accurately: Too much flour can lead to dense bars. Use the spoon-and-level method – spoon the flour into your measuring cup and level it off with a knife for accuracy.
- Don’t overmix: Mixing until just combined keeps your bars tender and chewy. Overmixing can develop gluten, making the texture tougher.
- Customize the chocolate chips: Experiment with different types of chocolate chips or even add in some chopped nuts for extra crunch and flavor!
- Cool completely before slicing: Allowing the bars to cool for at least one hour helps them set perfectly, making it easier to cut clean slices without crumbling.
How to Serve Chocolate Chip Cherry Bars
These Chocolate Chip Cherry Bars are not only delicious but also incredibly versatile when it comes to serving. Here are some delightful ideas to elevate your dessert experience!
Garnishes
- Powdered sugar: A light dusting of powdered sugar on top adds a touch of elegance and sweetness.
- Whipped cream: A dollop of dairy-free whipped cream brings creaminess that pairs beautifully with the cherry flavors.
Side Dishes
- Vanilla ice cream: The creamy texture and flavorful vanilla complement the sweetness of the cherry bars, creating an irresistible combination.
- Fresh fruit salad: A refreshing mix of seasonal fruits balances the richness of the bars while adding a splash of color on your plate.
- Yogurt parfait: Layering yogurt with granola and fresh cherries provides a lighter alternative that still satisfies your sweet tooth while adding a healthy twist.
Now you’re ready to enjoy these delightful Chocolate Chip Cherry Bars! Whether it’s a cozy family gathering or a fun get-together with friends, these bars are sure to be a hit. Happy baking!
Make Ahead and Storage
These Chocolate Chip Cherry Bars are perfect for meal prep! They store wonderfully, allowing you to make a batch ahead of time for snacks or dessert throughout the week.
Storing Leftovers
- Store bars in an airtight container at room temperature for up to 1 week.
- For optimal freshness, keep them in the refrigerator if you prefer a chilled treat.
Freezing
- Cut the bars into individual portions before freezing for easy access.
- Wrap each bar tightly in plastic wrap and place them in a freezer-safe bag or container.
- Enjoy them frozen for up to 3 months; simply thaw overnight in the refrigerator when you’re ready to enjoy!
Reheating
- For a warm treat, reheat the bars in the microwave for about 10-15 seconds.
- Alternatively, place them in a preheated oven at 350F for about 5 minutes, just until warmed through.
FAQs
Here are some common questions about making these delicious Chocolate Chip Cherry Bars!
Can I substitute fresh cherries with frozen ones when making Chocolate Chip Cherry Bars?
Yes! You can use frozen cherries in this recipe. Just make sure to thaw and drain any excess moisture before adding them to the batter.
How do I know when my Chocolate Chip Cherry Bars are done baking?
Look for the edges of the bars to start pulling away from the sides of the pan, and ensure that the center is set. A toothpick inserted should come out clean or with just a few moist crumbs.
Can I use other types of chocolate chips?
Absolutely! Feel free to experiment with dark chocolate, white chocolate, or even a mix of different flavors to suit your taste preferences.
What can I serve with Chocolate Chip Cherry Bars?
These bars are delightful on their own but pair wonderfully with a scoop of vanilla ice cream or a dollop of whipped cream for an extra special touch!
Final Thoughts
I hope you find joy in baking these delightful Chocolate Chip Cherry Bars! Their wonderful blend of flavors and textures makes them truly special. Whether you’re enjoying them as a snack or sharing with friends, I’m sure they’ll be a hit. Happy baking, and don’t forget to share your experience—I can’t wait to hear how yours turn out!